There is also a free multiplatform App just for measuring process time: TIME STUDY MULTIPLATFORM APP.
Try also the other free BPI Cloud Computing tools for Activity Networks, Modeling of Queues, Decision Modeling, Statistical Process Control, etc. here: BPI TOOLS.
Try also the other free BPI Cloud Computing tools for Activity Networks, Modeling of Queues, Decision Modeling, Statistical Process Control, etc. here: BPI TOOLS.
Time your Project's Activities and save them
directly to your Calendar.
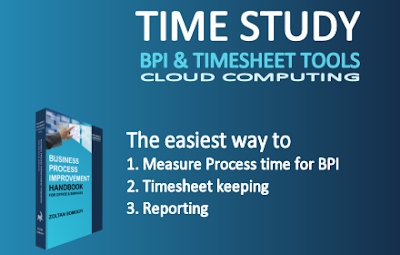
The FREE 'Time Study - BPI Tools' can be used for 3 things:
- Easily Measure Process Time for Business Process Improvement
- Timesheet Recording & Keeping (e.g. for consultants)
- Reporting
This tool is available as a free Google Sheets Add-on and can be accessed from anywhere (in the cloud) from any device (PC, Mac, tablet, smart phone, digital TV, etc.) with a web browser. The Add-on is optimized for the free Google Chrome web browser.
TIP: If you use Google Sheets on your tablet use the Chrome web browser (not the Sheets App!) and after navigating to the Google Sheets website (https://sheets.google.com) click on the top right menu (3 dots) in Chrome and check the 'Request desktop site' check box. In this way you will be able to use the full functionality of Google Sheets and this Add-on on your tablet! Please note that you may need to change your default keyboard app to a keyboard which can be made invisible and/or smaller (e.g. to 'Fleksy') in order to prevent the keyboard occupying a large part of the screen.
How to start using this free Tool:
- Start Google Sheets (button here under).
- Start a New Blank spreadsheet and rename it to e.g. Timesheet. Use the Add-on always with this spreadsheet because the spreadsheet is used for storing important information. You can of course start a new spreadsheet any time with a new database.
- Add the 'Time Study - BPI Tools' add-on from the Add-ons menu (available in the Google Web Store for free). Click the menu 'Add-ons', then click 'Get add-ons'. The Add-ons screen will appear. Use the search box on the top-right and search for 'Time Study - BPI Tools' and add it with the + FREE button.
- When the Authorization Required dialog appears push 'Continue'.
- In the dialog 'Time Study - BPI Tools would like to:' push the 'Allow' button. This is a standard procedure to authorize the Add-on to work with your current spreadsheet.
- Read the Intro & Help (in the Sidebar menu) on how to use the add-on.
Last Time Study/Timesheet Version 11/Update: 14.08.2016
Use the Software feedback form to request new features or report problems:
Measure Process Time - Timing
You can easily measure process time with this tool from a few seconds till several hours. Just select a Calendar where you want to record your process time, select the Project Name and the Action Name. Then press Start Timing when you start your action and push End Timing when you are ready. You can add an extra Note to the recording when you click End Timing. It does not matter if you switch off the tool, it will keep timing (in the cloud!). Just remember to stop the timer when you are ready. In case you switch off the timer on a different day than it is started, the timer will be reset to the start day at 20.00 (only 1 day events are allowed!).
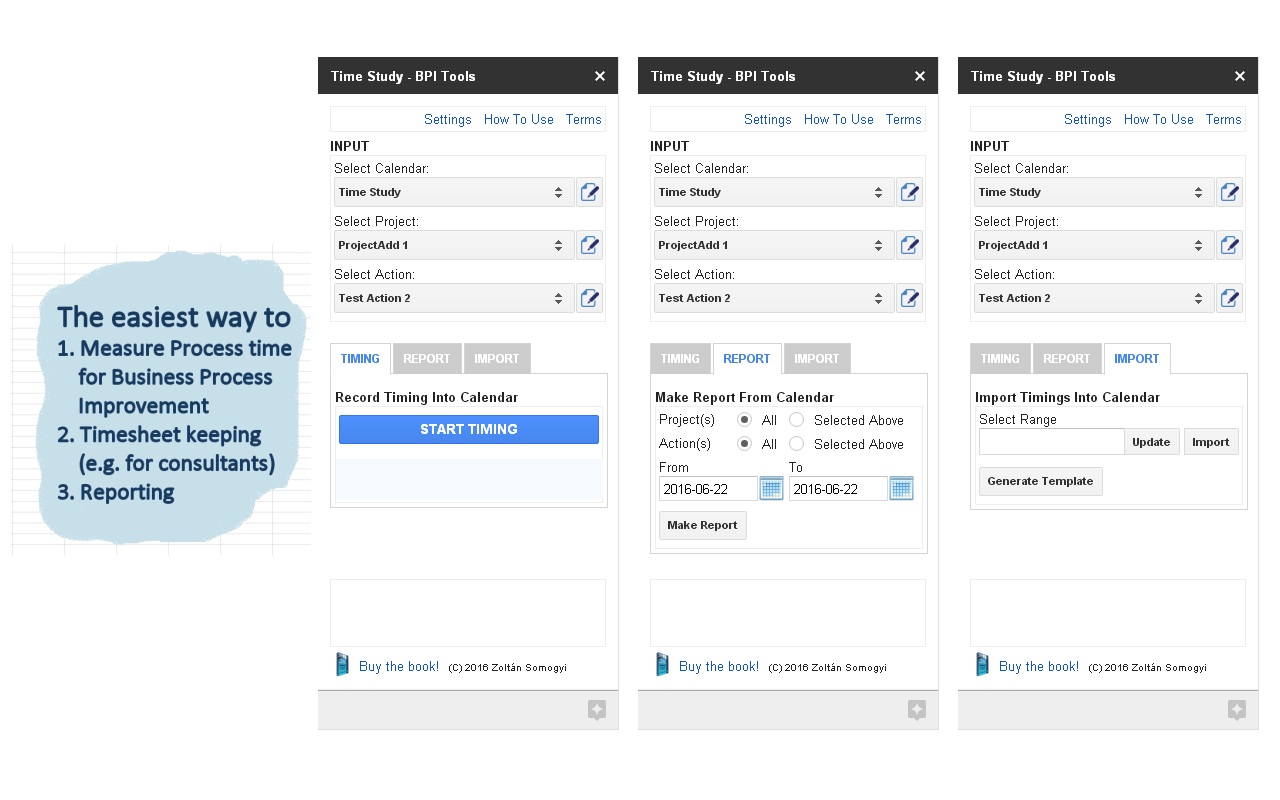
Read the Calendar section on how to add a new calendar in the Settings. All timings are stored in the Google Calendar of your choice!

Read the Calendar section on how to add a new calendar in the Settings. All timings are stored in the Google Calendar of your choice!
Geographical Location
The Add-On also records your geographical location at the start and also at the end of the timing period!
The accuracy of the geographical position depends on your device's capabilities! A device with a GPS will provide the most accurate positions (10-20 m), a device with a WiFi connection but without a GPS will provide less accurate positions (1-2 km) and finally a computer without GPS and without WiFi will provide the least accurate positions.
TIP: You must define your Project names and Action names in the Database before using this module.
BUSINESS PROCESS IMPROVEMENT HANDBOOK FOR OFFICE & SERVICES
FOR EXPERTS & MANAGERS AN ADVANCED GUIDE
Database
The database is a hidden Sheet with the name TS_Database which stores your Project and Action definitions. It is created automatically when you start the add-on for the first time and you must edit it in the Settings (Edit Database) in order to add your Projects and Actions. The timing data is not stored in this database but in the Google Calendar of your choice!
How to add or delete a Project or Action (task):
How to add a new Project or Action (task) in the Advanced Editor:
How to add or delete a Project or Action (task):
- Click the Edit Database button next to the Project or Action fields. The Edit Database screen will open.
- Select the Project or Action option.
- Use the Add or Delete section to add or delete a Project or Action.
How to add a new Project or Action (task) in the Advanced Editor:
- Open the Database Editor and push the Advanced Editor button.
- Add a Project Name and/or Action Name in the appropriate column (white cell).
- Add a Project and/or Action Description (optional).
IMPORTANT: Do not fill in the Project ID and Action ID columns! These will be generated automatically. - Push the Save button on the Sidebar (Database Editor). The new database will be loaded automatically.
- Open the Database Editor and push the Advanced Editor button.
- Delete the Project ID, Project Name and Project Description or Action ID, Action Name and Action Description.
- Push the Save button on the Sidebar (Database Editor). The new database will be loaded automatically.
TIP: You can sort the Projects or Actions alphabetically in Advanced Edit mode on the Edit Database screen. E.g. to sort the Projects select all of the Project ID, Project Name and Project Description cells and use the 'Sort range' command from the Google Sheets menu!
IMPORTANT: Do not remove or add columns to the TS_Database Sheet!
IMPORTANT: If you accidentally delete an ID from the database (Project or Action) the ID will be regenerated automatically but the Project/Action will be treated as a new Project/Action and you will not be able to read the data from the calendar with the old ID's! You can restore the missing ID from your backup or you can Export the Calendar in the Settings and restore your database ID's manually!
Calendar
All Timing/Timesheet data is stored in the Google Calendars of your choice as a special event! You can use any existing Calendar or make a new one. The 'Time Study - BPI Tools's timing events are marked as special events and are not interfering with other events in the chosen Calendar. Please note that you can not add a Time Study event to your Calendar manually, you need to use the built-in timing module or import Timesheet module!
Follow the next steps to create a Google Calendar:
Follow the next steps to create a Google Calendar:
- Open the Settings and push the Google Calendar button.
- On the left side of the web page search for 'My Calendars' and click on the small down arrow.
- Click the 'Create new calendar' menu item.
- Fill in the Calendar name
- IMPORTANT: Set the 'Calendar Time Zone:' to the correct time zone of your location! First select the Country and then the time zone in the 'Now select a time zone:' field.
- If you want to share this Calendar with someone then add a new email in the 'Share with specific people' section.
- Click Create Calendar at the bottom of the page.
- Go back to Google Sheets and the add-on and push the Save button in the Settings. The new Calendar will be loaded automatically.
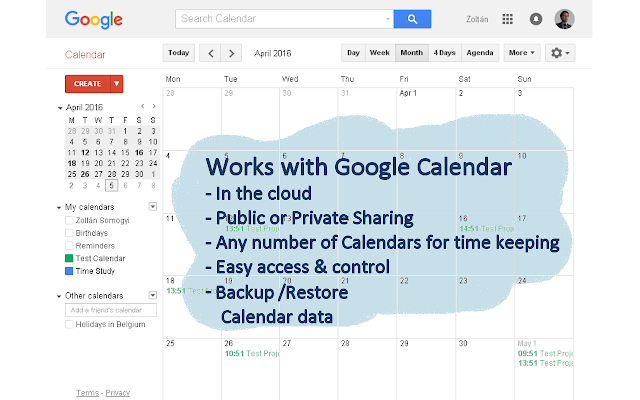
TIP: You can transfer data from one Calendar to an other one with the Export/Import module in the Settings!
TIP: You can share a Calendar with several team members, who all have a copy of this Add-on (linked to the same or to a different Spreadsheet) and the same Project/Action database (TS_Database), and record the duration of the project they are working on together! In case you want to use the same TS_Database database in different spreadsheets you have to copy the whole database including the existing ID's (Project and Action) to the new spreadsheet!
Import Timesheet
You can import a Timesheet (several time measurements for a Project/Action + Note) at once into the selected Calendar.
How to import your timesheet data:
- Select the Calendar at the top of the sidebar (in the Timing section) in which you want to import your data.
- Activate the Sheet with your data. The data should be entered in the following columns without a header row:a. ProjectName: the name of the project. Must be in the database!b. ActionName: the name of the action. Must be in the database!c. Note: the note added to the action.d. StartTime: the start time in the following format: 2016-03-22T07:51:50e. EndTime: the end time in the following format: 2016-03-22T07:51:50IMPORTANT: The time format is according to ISO 8601 but without the time zone designator at the end: YYYY-MM-DDTHH:MM:SS
- Select the range with your data (should be the above 5 columns and as many rows as you need).
- Click on the 'Update' button.
- Click on the 'Import' button.
Before each row an OK! will appear if the data could be imported or an error if not. There can be several reasons why your data may not be imported e.g. if the Project or Action name is not in the database (TS_Database), wrong date/time format, etc.
TIP: Use the Generate Template button to generate an example import sheet with the right format!
TIP: If you can not access the internet temporarily then you can record your timings in an offline spreadsheet (e.g. by the Google Sheets App, MS Excel, etc.) or on paper and import the Timesheet later by using the built-in import module!
Settings & Backup/Restore Calendar Period
How to set the Precision of the Reported timings [h]:
- Set the number of digits.
- Push the Save button to save the settings and to return to the main screen.
Prepend Key to Notes:
- Set the 3 letter key which will be prepend automatically to all Notes added to a time measurement event.
- Push the Save button to save the settings and to return to the main screen.
TIP: Use this 3 letter key to automatically identify a group member while using the add-on!
How to edit the Project/Actions Database:
IMPORTANT: Before Importing/Restoring your Calendar data for the first time Export/Backup a selected period in order to see the required format of the Import!
- Push the Edit button and follow the steps explained in the Database section of this help.
- Check the 'Log Time Measurements' checkbox if you want to log automatically all time measurement into a Sheet called LOGS.
- Push the Save button.
- Push the Google Calendar button.
- Add or change your Calendar (follow the steps explained in the Calendar section).
- Return to the Google Sheet/add-on and push the Save button to return to the main screen and to reload the Calendar.
IMPORTANT: Before Importing/Restoring your Calendar data for the first time Export/Backup a selected period in order to see the required format of the Import!
- Select the Calendar from where you want to export your data.
- Select the 'Export/Backup' option.
- Select the desired Export period (From > To).
- Click on the Start button. A new Sheet will be added with the exported data.
- Select the Sheet with the Backup data Exported with this tool.
- Select the Calendar where you want to import your data.
- Select the period which you want to Import (From > To). Only this period will be imported from the backup!
- Select the 'Import/Restore' option.
- Click on the Start button.
TIP: You can also transfer data from one Calendar to an other one with this module.
Report
The Report module is a simple to use but powerful tool. You can make an automatic report for all of your projects and actions for any given time period.
TIP: You can download the report in different formats: PDF, MS Excel, etc. For a PDF report in the File menu (top-left side of your screen) click Download as > PDF document (.pdf).
Follow the next steps to make a Report:
- Select the Calendar containing your data in the Timing section (top of the sidebar).
- Select a Project in the Timing section if you only want to Report 1 Project.
- Select an Action in the Timing section if you only want to Report 1 Action.
- Project(s): Select 'All' if you want to Report all of your Projects, select 'Selected' if you only want to Report 1 Project.
- Action(s): Select 'All' if you want to Report all of your Actions, select 'Selected' if you only want to Report 1 Action.
- Define the Reporting period (From > To).
- Click the Make Report button.
A Report Sheet will be created with a name depending on the Reporting period you choose.
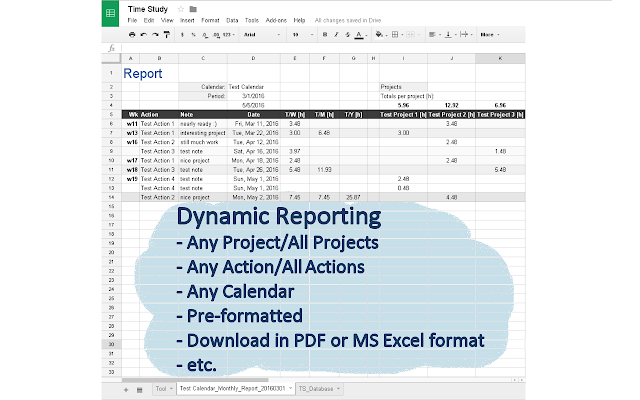
TIP: You can easily make a PDF invoice for a Project from your Report by extending the Report sheet manually with e.g. a price column and other necessary elements! In case you do this then do not forget to rename the Sheet because it will be overwritten if you request a new Report!
The Report contains the following columns:
- Wk: week number.
- Action: action name.
- Note: a note added to the action.
- Start: the start day and time of the action (task).
- T/W [h]: Total per week. [hours]
- T/M [h]: Total per Month. [hours]
- T/Y [h]: Total per Year. [hours]
- Projects: The duration of each Action for the given Project and the totals per Project. [hours]
- Locations: the geographical locations at the start and at the end of the timing period (latitude, longitude) with a link to a map with your location. The link (Show) includes an 'accuracy=' parameter which is the accuracy of the position (see note here under). This accuracy is not shown on the map.
Notes:
- The accuracy of the geographical position depends on your device's capabilities! A device with a GPS will provide the most accurate positions (10-20 m), a device with a WiFi connection but without a GPS will provide less accurate positions (1-2 km) and finally a computer without GPS and without WiFi will provide the least accurate positions.
- You can set the precision (number of digits) of the results in the Settings.


